> ## Documentation Index
> Fetch the complete documentation index at: https://docs.deflect.in/llms.txt
> Use this file to discover all available pages before exploring further.

# Launch an agent on your website

> End-to-end checklist: from first login to a live chat widget your visitors can use

This guide is for **first-time setup**: you will create an agent, add knowledge in the **Knowledge Base** section and **link** it to the agent (optional but recommended), generate a secure embed snippet, restrict it to your domains, paste it on your site, and verify everything works.

## What you need before you start

* A **Deflect account** with access to the dashboard ([app.deflect.in](https://app.deflect.in)).
* A member with the **Admin** or **Developer** role. In Deflect, organization roles are **Admin**, **Developer**, and **Agent**. **Admin** and **Developer** can set up agents, the **Knowledge Base**, widget **API keys**, and **domain** allowlists; **Agent** is for live queues and tickets (see [Team management](/team-management)).
* Access to your **website’s HTML** (or your web developer) so you can paste one `<script>` tag before `</body>`.
* (Recommended) The **URL** of your help center or marketing site if you want the agent to answer from live web pages—not only uploaded files.

## Step 1 — Sign in and open Agents

1. Go to **[app.deflect.in](https://app.deflect.in)** and sign in.
2. Open **Agents** from the sidebar.
3. Click **Create agent** (or equivalent) and give it a clear name, e.g. `Support – Website`.

<Frame caption="Agents list in the Deflect dashboard—open **Agents** and use **Create agent** to start.">
  <img src="https://mintcdn.com/quensultingai/xnI-ZHCSg6FKh-rL/images/launch-agents-list.png?fit=max&auto=format&n=xnI-ZHCSg6FKh-rL&q=85&s=8f93cf0d162e87772fa610696fa0c067" alt="Deflect dashboard showing the agents list and create agent entry point" width="1912" height="962" data-path="images/launch-agents-list.png" />
</Frame>

## Step 2 — Teach the agent who it is (persona)

1. Open your new agent to enter the **Agent editor**.
2. Find **System prompt** / instructions and describe:
   * **Role** (e.g. “You are the support assistant for Acme Corp.”).
   * **Tone** (friendly, concise, formal).
   * **Boundaries** (what to escalate, what not to guess).
3. Set **Language** behavior if you serve multiple locales—see [Set language](/set-language).
4. Configure **Welcome message** (static or dynamic) so the first message in the widget matches your brand.

<Frame caption="Inside the **Agent editor**: system prompt, model, and related settings for this agent.">
  <img src="https://mintcdn.com/quensultingai/xnI-ZHCSg6FKh-rL/images/launch-inside-agent.png?fit=max&auto=format&n=xnI-ZHCSg6FKh-rL&q=85&s=5b0a6d5c2c45c39d605ead2117b16f90" alt="Deflect agent editor showing persona and configuration options" width="1912" height="962" data-path="images/launch-inside-agent.png" />
</Frame>

For deeper tuning, see [Prompt engineering](/prompt-engineering) and [Create chat agent](/create-chat-agent).

## Step 3 — Add knowledge (strongly recommended)

Without linked knowledge, the agent only knows what you put in the prompt. **Uploads and web crawls happen in the Knowledge Base section—not inside the agent.**

1. In the dashboard sidebar, open **Knowledge Base**.
2. **Upload** PDF or Markdown files and/or **add a website** (URL, sitemap, web crawl) there. Wait until each source is **processed / ready**.
3. Open your **Agent** → **Agent editor** and use **Knowledge** / **Add knowledge base** to **link** the knowledge base(s) you just created.

Details on crawl options, schedules, and citations: [Knowledge base](/knowledge-base).

Wait until processing shows **ready** before relying on answers in production.

## Step 4 — Optional: handoff, tickets, and tools

Configure when you are ready—none of these block the widget from loading:

* **[Human handoff](/human-handoff)** — Live agents, schedules, **ticket-only** mode, Freshdesk/Freshchat.
* **[Tickets](/tickets)** — How structured tickets appear in the dashboard.
* **[Custom functions](/custom-functions)** — Call your own APIs from the agent.

## Step 5 — Test inside the dashboard

1. In the **Agent editor**, use the **test chat** (preview panel) on the right.
2. Ask questions you expect real visitors to ask; confirm citations or tone match your policy.
3. Fix the prompt or knowledge, then test again.

## Step 6 — Create an API key and connect the widget to this agent

The public widget does **not** use your personal login. It uses an **API key** tied to your org, plus the **chatbot id** of this agent.

1. Open **Settings** → **Widget** (org-level widget & keys).
2. **Create API key** if you do not have one. Copy it once—many dashboards hide the full key later.
3. In the widget panel, choose **this agent** from the chatbot / agent dropdown so the snippet points at the right bot.
4. Click **Copy** on the generated **embed snippet**.

<Frame caption="**Settings → Widget**: API key, agent selection, and the embed snippet to copy.">
  <img src="https://mintcdn.com/quensultingai/xnI-ZHCSg6FKh-rL/images/launch-widget-settings.png?fit=max&auto=format&n=xnI-ZHCSg6FKh-rL&q=85&s=1a9603031a0ab5b69cf12334a1bd95dc" alt="Deflect widget settings page with API key and embed snippet" width="1912" height="962" data-path="images/launch-widget-settings.png" />
</Frame>

Details and security notes: [Widget installation](/widget-installation).

## Step 7 — Whitelist your production domains

The widget only runs on domains you **explicitly allow**. With **no** domains added, requests from the embed are **blocked** (fail closed for security). Add every production (and staging) hostname you need **before** testing the snippet on a live page.

1. **Settings** → **Domains**.
2. Add the domain where you will load the widget.

<Frame caption="**Settings → Domains**: allowlist the hostnames where the widget is allowed to load.">
  <img src="https://mintcdn.com/quensultingai/xnI-ZHCSg6FKh-rL/images/launch-whitelist-domains.png?fit=max&auto=format&n=xnI-ZHCSg6FKh-rL&q=85&s=61eb94ea8f4bb473eec8e1ba5a730c01" alt="Deflect domain whitelist settings" width="1912" height="962" data-path="images/launch-whitelist-domains.png" />
</Frame>

Use **staging** domains too if you test on a non-production host.

## Step 8 — Paste the snippet on your website

Add the script **once per page** (or in a shared layout) **before** `</body>`:

```html theme={null}
<script
  src="https://widget.deflect.in/widget.js"
  data-api-key="YOUR_API_KEY"
  data-chatbot-id="YOUR_CHATBOT_ID"
></script>
```

* Replace placeholders with values from the dashboard snippet—**do not** commit real API keys to public GitHub repos.
* **Single Page Apps (React, Next.js, etc.):** inject the same tag in the document body via your root layout or `index.html`, not only inside a client-only div that never reaches the body end if your framework strips it.

## Step 9 — Verify on the live site

1. Open your site in a **normal browser window** (or incognito) on a **whitelisted** domain.
2. Confirm the **chat launcher** appears and opens.
3. Send a test message; confirm the reply and (if enabled) streaming or status text behaves as expected.
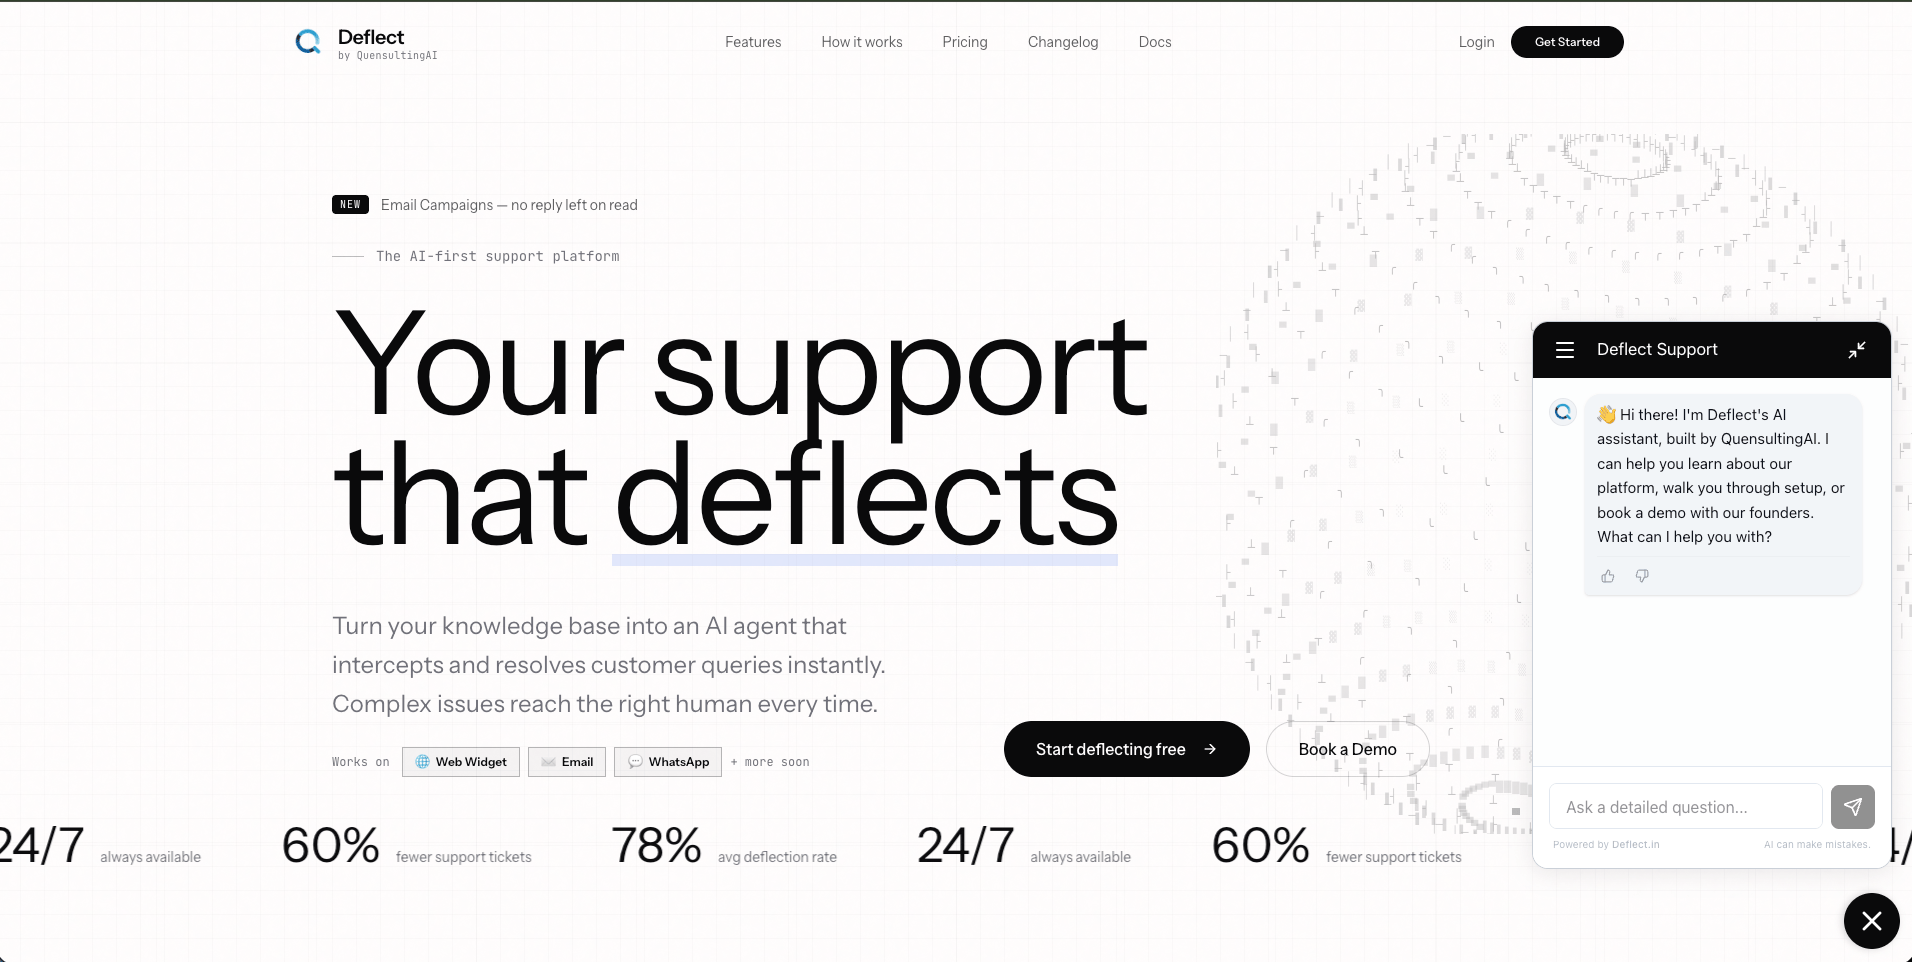
<Frame caption="Your **live website** with the Deflect widget open and a conversation in progress.">
  <img src="https://mintcdn.com/quensultingai/xnI-ZHCSg6FKh-rL/images/launch-website-widget.png?fit=max&auto=format&n=xnI-ZHCSg6FKh-rL&q=85&s=0e57e4cf2161a5608362f545e6f1576a" alt="Example website with the Deflect chat widget open" width="1912" height="962" data-path="images/launch-website-widget.png" />
</Frame>

If the widget does not load:

* Confirm the **domain** matches the allowlist (scheme and `www` matter—match what visitors use).
* Open the browser **developer console** on the **Network** tab and check for blocked requests to `widget.deflect.in`.
* Re-copy the snippet if you rotated the API key or switched agents.

## Step 10 — Go live checklist

| Check                                                                           | Done? |
| ------------------------------------------------------------------------------- | ----- |
| Agent prompt and knowledge reviewed                                             | ☐     |
| Test chat passed for top visitor questions                                      | ☐     |
| API key created; snippet uses correct **chatbot id**                            | ☐     |
| Production (and staging) domains allowlisted                                    | ☐     |
| Snippet deployed only on HTTPS pages you control                                | ☐     |
| Team knows how to answer **[Live chat](/live-chat)** / tickets if handoff is on | ☐     |

## Related guides

<CardGroup cols={2}>
  <Card title="Quickstart" icon="bolt" href="/quickstart">Short 5-minute overview.</Card>
  <Card title="Widget installation" icon="code" href="/widget-installation">Snippet, domains, customization, preview.</Card>
  <Card title="Create chat agent" icon="robot" href="/create-chat-agent">Every agent setting in depth.</Card>
  <Card title="Knowledge base" icon="book" href="/knowledge-base">Files, URLs, and web sources.</Card>
</CardGroup>
