

New to Deflect? Start with Launch an agent on your website for a full checklist from first login to a verified live widget.
Generating the embed snippet
1
Navigate to Settings
Go to Settings → Widget tab in your dashboard.
2
Create an API Key
If you haven’t already, click Create API Key, give it a name (e.g., “Production Website”), and click Create.
3
Select Your Chatbot
Choose which chatbot the widget should be connected to from the dropdown.
4
Copy the Snippet
The embed snippet will be generated automatically. Click Copy to copy it to your clipboard.
5
Paste into Your Website
Add the snippet just before the closing
</body> tag in your website’s HTML:Domain Whitelisting
For security, you should restrict which domains can use your API key.- Go to Settings → Domains tab.
- Click Add Domain.
- Enter your website domain (e.g.,
example.com). - Click Add.
Origin header; it must match a domain you added under Settings → Domains, or the widget cannot connect (including WebSocket chat).
Widget Customization
Welcome Message
Configure the initial greeting users see when they open the chat:- Static: A fixed message you define (e.g., “Hi! How can I help you today?”).
- Dynamic: An AI-generated greeting based on context.
Auto-Open
Enable auto-open to have the widget automatically open when a user visits your site:- Go to Settings → Widget tab.
- Toggle Auto Open on.
AI Popup Greeting
Show a small popup message next to the chat icon to encourage interaction:- Go to Settings → Widget tab.
- Toggle AI Greeting Popup on.
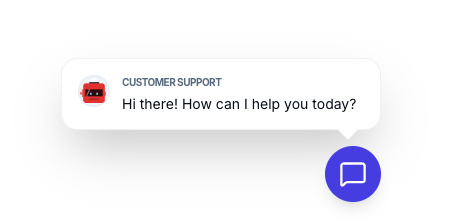
Product screenshot: widget with popup greeting (replace if your branding refresh makes this outdated).
Visitor image uploads (web widget)
For agents that run on your website, you may enable image uploads so visitors can send screenshots or photos (for example, an error dialog). When enabled, images are validated and the assistant can use a text description of the image in context. Leave the feature off if you want strictly text-only conversations. Configure per agent in the Agent editor (look for an images / uploads toggle for the web channel). Availability can depend on your plan.Testing
Before going live, use the Preview Widget to test the full user experience:- Go to the Agent Editor for your chatbot.
- Use the built-in chat window on the right to test responses.
- Or go to Settings → Widget and click Preview to see the widget exactly as users will.